
Electrolux ER 6825 D Lodówka – Instrukcja obsługi w formacie pdf, czytaj online za darmo. Mamy nadzieję, że okaże się ona pomocna w przypadku jakichkolwiek pytań związanych z użytkowaniem urządzenia.
Jeśli nadal masz wątpliwości, zadaj pytanie w komentarzach pod instrukcją.
"Ładowanie instrukcji" oznacza, że musisz poczekać na pobranie pliku, aby móc go przeczytać online. Niektóre instrukcje są bardzo obszerne, a czas ich ładowania zależy od szybkości łącza internetowego.
5
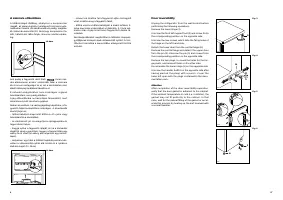
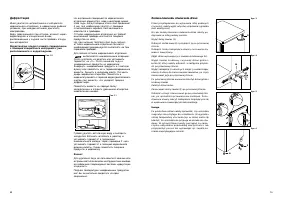
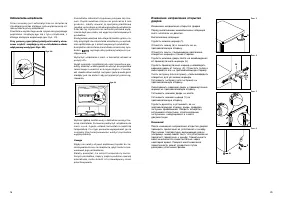
Ajtónyitás irányának megcserélése
Miel
o
tt a szereléshez hozzákezdene, áramtalanitsa a
készüléket.
Az ajtónyitás irányát az alábbi módon lehet megcse-
rélni:
Szerelje le az alsó (1) csuklós pántot.
Csavarja le a baloldali (6) támasztó lábat és tegye át
az ellenkez
o
oldalra.
Vegye ki a baloldali rögzit
o
furatokat takaró csavaro-
kat.
Emelje le az alsó ajtót a (H) középs
o
ajtótartó pántról.
Szerelje le a középs
o
pántot és emelje le a fels
o
ajtót
az (5) csapról; csavarja ki ezt a csapot és szerelje át az
ellenkez
o
oldalra.
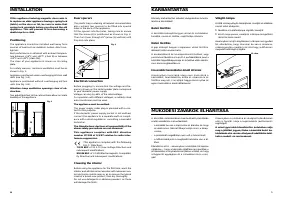
Vegye ki a furatdugót/dugókat (ha vannak), a szaba-
don maradt furatokba lesznek becsavarozva a for-
gópánt csapok, tegye át a furatdugókat az ellenkez
o
oldalra.
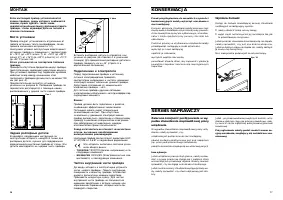
Szerelje vissza a fels
o
ajtót és a középs
o
pántot az el-
lenkez
o
oldalra.
Tegye vissza az alsó ajtót.
Szerelje vissza az alsó (1) csuklós pántot az ellenkez
o
oldalra.
Szerelje le a fogantyút. Lyukassza ki az ellenkez
o
ol-
dalon a furattakaró dugaszokat, és szerelje át a fogan-
tyút. A szabadon maradt furatokat a használati utasi-
tás tasakában található dugaszokkal fedje be.
Figyelem
Miután megcserélte az ajtó nyitásirányát, ellen
o
rizze,
hogy a tömit
o
mágneses profil jól tapad-e a szekrény-
hez. Ha a szobah
o
mérséklet alacsony (pl. télen), el
o-
fordulhat, hogy a mágnesprofil nem fekszik fel tökéle-
tesen az ajtókeretre. Ez esetben vagy megvárja, hogy
a tömit
o
profil magától hozzáidomul a szekrényhez,
vagy pedig egy hajszáritóval óvatosan felmelegiti a tö-
mitést el
o
segitve e módon annak gyorsabb illeszke-
dését.
3. ábra
4. ábra
5. ábra
6. ábra
5
D548
D405
H
PR228
D646
1
6
40
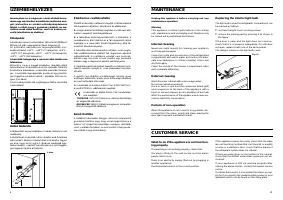
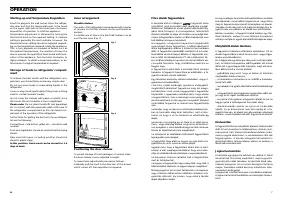
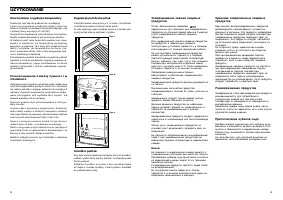
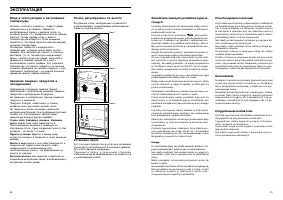
Defrosting
Frost is automatically eliminated from the evaporator
of the refrigerator compartment every time the motor
compressor stops, during normal use. The defrost wa-
ter drains out through a trough into a special container
on the back of the appliance where it evaporates.
Periodically clean the defrosting water drainage
hole of the refrigerator, using the special cleaner
already inserted into the discharge hole.
Fig. 10
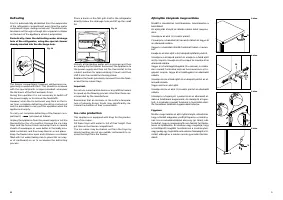
The freezer compartment, however, will become pro-
gressively covered with frost. This should be removed
with the special plastic scraper provided, whenever
the thickness of the frost exceeds 4 mm.
During this operation it is not necessary to switch off
the power supply or to remove the foodstuffs.
However, when the ice becomes very thick on the in-
ner liner, complete defrosting should be carried out
and it is advisable to carry out this operation when the
appliance is empty.
To carry out complete defrosting of the freezer com-
partment (
) proceed as follows:
Unplug the appliance from the power supply or set the
thermostat on the «
O
» position. Remove the ice-cube
trays and the frozen foods and wrap them in several
sheets of newspaper or, even better, in thermally insu-
lated containers, and then keep them in a cool place.
Keep the freezer door open and introduce a container
filled with hot water (taking care to place this on a lay-
er of cardboard) so as to accelerate the defrosting
process.
D037
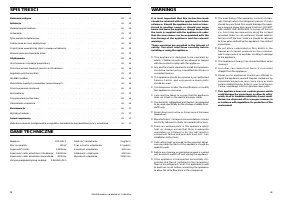
Place a basin on the first grill shelf in the refrigerator
directly below the drainage hole and lift up the small
lid.
Fig. 11
Absorb all remaining water with a sponge and then
accurately dry the freezer. Reconnect the appliance to
the power supply and then set the thermostat to the
coldest position for approximately 2 hours and then
shift it into the normal functioning status.
Replace the foods previously removed from the freez-
er and the ice cubes trays.
Important
Do not use a mechanical device or any artificial means
to speed up the thawing process other than those rec-
ommended by the manufacturer.
Remember that an increase in the surface tempera-
ture of already-frozen foods may significantly de-
crease the duration of their conservation.
Ice-cube production
This appliance is equipped with trays for the produc-
tion of ice-cubes.
Fill these trays with water to 3/4 of their height, then
put them in the freezer compartment.
The ice-cubes may be shaken out from the trays by
simply twisting; do not use metallic instruments to re-
move the trays from the freezer.
PR134
Nadal masz pytania?Nie znalazłeś odpowiedzi w instrukcji lub masz inne problemy? Zadaj pytanie w poniższym formularzu i opisz szczegółowo swoją sytuację, aby inni użytkownicy i eksperci mogli udzielić ci odpowiedzi. Jeśli wiesz, jak rozwiązać problem innej osoby, podziel się swoją wiedzą :)


