ROCCAT Isku - Instrukcja obsługi
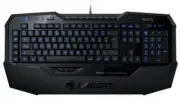
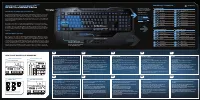
Krótki przewodnik instalacji klawiatury gamingowej ROCCAT ISKU obejmuje jej podstawowe funkcje, w tym konfigurowalną funkcję podwójnych klawiszy z funkcją EasyShift[+] oraz zaawansowane możliwości nagrywania makr, takie jak Macro Live!. Dokument odnosi się również do zgodności z innymi urządzeniami ROCCAT za pośrednictwem systemu Set Bonus, podając jednocześnie niezbędne specyfikacje techniczne, takie jak wymagania sprzętowe i szczegóły dotyczące opakowania.
FR
PL
RU
SE
1. Für einen ergonomischeren Stand klappe die Füße an der
Unterseite der Tastatur aus.
2. Verbinde den USB-Stecker der ROCCAT™ Isku mit einer
freien USB-Schnittstelle.
3. Starte deinen Computer und stelle eine Verbindung mit
dem Internet her.
4. Gebe in die Adresszeile deines Webbrowsers die folgende
URL ein „www.roccat.org/support“ und drücke Enter.
5. Klicke in der linken Navigationsleiste auf den Punkt
„ROCCAT Isku“. Lade dir auf der sich öffnenden Seite die
neueste Treiber-Software herunter.
6. Starte die Treiber-Installation und folge bitte den weiteren
Anweisungen auf dem Bildschirm.
1. Til ergonomisk opstilling klappes fødderne på tastaturets
bund ud.
2. Forbind ROCCAT™ Isku’s USB-stik med et ledigt
USB-interface.
3. Start din computer og forbind den med Internettet.
4. Indtast følgende URL i adresselinjen af din webbrowser
„www.roccat.org/support“ og tryk så Enter.
5. Klik i venstre navigantionslinje på punkt „ROCCAT Isku“.
Frau den åbnede side overfører du den nyeste
driversoftware.
6. Start driver-installationen og følg anvisningerne på
billedskærmen.
1. For a more ergonomic position, fold out the stands on the
base of the keyboard.
2. Plug the ROCCAT™ Isku’s USB connector into any
free USB port.
3. Boot your computer and connect to the internet.
4. Enter ‘www.roccat.org/support’ in your browser and
hit the return key.
5. In the navigation bar on the left, go to ‘ROCCAT Isku’.
Download the latest driver from the webpage that opens.
6. Start the driver installation process and follow the
on-screen instructions.
1. Para un equilibrio más ergonómico, saca las patas que
están debajo del teclado.
2. Enchufa el conector USB del ROCCAT™ Isku a un puerto
libre USB.
3. Inicia tu ordenador y establece la conexión de Internet.
4. Escribe en tu navegador Web la siguiente URL:
www.roccat.org/support y pulsa Enter.
5. En la barra izquierda de navegación haz clic en el
punto “ROCCAT Isku”. En la página que se abre a
continuación descárga el software de controlador más
actualizado.
6. Inicia la instalación del controlador y sigue las instruccio-
nes que aparecen en pantalla.
1. Käännä näppäimistön alla olevat jalat ulos ergonomista
asentoa varten.
2. Liitä ROCCAT™ Isku:n USB-pistoke vapaaseen
USB-liitäntään.
3. Käynnistä tietokoneesi ja luo Internet-yhteys.
4. Kirjoita verkkoselaimesi osoiteriville seuraava URL-osoite
„www.roccat.org/support“ ja paina Enter.
5. Napsauta vasemmassa navigaatiopalkissa kohtaa
„ROCCAT Isku“. Lataa avautuvalta sivulta uusin
ajuriohjelmisto.
6. Käynnistä ajurin asennus ja noudata näytöllä näkyviä
lisäohjeita.
DE
DK
EN
ES
FI
TR
1. Déplie les pieds sur la face inférieure du clavier pour une
plus grande ergonomie.
2. Relie la fi che USB de la souris ROCCAT™ Isku à une prise
USB libre.
3. Démarre ton ordinateur et connecte-toi à Internet.
4. Entre dans la barre d’adresse de ton navigateur l’URL
« www.roccat.org/support » et appuie sur Enter.
5. Clique dans le menu de navigation de gauche sur
« ROCCAT Isku ». Télécharge la dernière version du pilote
sur la page qui s’ouvre alors.
6. Lance l’installation du pilote et suis les instructions qui
s’affi chent à l’écran.
1.
Aby uzyskać pozycję ergonomiczną, rozłóż nóżki po
spodniej stronie klawiatury.
2.
Podłącz wtyk USB ROCCAT™ Isku do wolnego
złącza USB.
3.
Uruchom komputer i nawiąż połączenie z Internetem.
4.
W wierszu adresowym przeglądarki wpisz adres URL
„www.roccat.org/support“ i naciśnij Enter.
5.
W lewym pasku nawigacji kliknij punkt „ROCCAT Isku“.
Z nowo otwartej strony pobierz najnowsze sterowniki.
6.
Rozpocznij instalację sterowników i postępuj zgodnie z
instrukcjami na ekranie.
1.
Для обеспечения эргономичного положения открой
ножки на нижней стороне клавиатуры.
2.
Соедини USB-штекер ROCCAT™ Isku со свободным
USB-портом.
3.
Запусти компьютер и выйди в интернет.
4.
Введи в адресной строке браузера адрес
„www.roccat.org/support“ и нажми Enter.
5.
Нажми на левой навигационной панели пункт
„ROCCAT Isku“. Загрузи с открывшейся страницы самые
последние драйвера.
6.
Запусти инсталляцию драйвера и следуй дальнейшим
указаниям на экране.
1. Fäll ut fötterna under tangentbordet så att det står i en
ergonomisk ställning.
2. Sätt ROCCAT™ Isku USB-kontakt i en ledig USB-port.
3. Starta datorn och koppla upp dig på Internet.
4. Skriv in följande URL i adressfältet på din webbläsare:
www.roccat.org/support. Tryck på Enter.
5. Klicka på ROCCAT Isku i det vänstra navigationsfältet.
Ladda ner den senaste programvaran med drivrutin på
den sida som öppnas.
6. Starta installationen av drivrutin och följ anvisningarna
på skärmen.
1.
Ergonomik bir duruş için klavyenin altındaki ayakları
dışa katla.
2.
ROCCAT™ Isku USB fi şini boş bir USB girişine tak.
3.
Bilgisayarı başlat ve internete bağlan.
4.
Web tarayıcının adres satırına “www.roccat.org/support”
URL adresini gir ve Enter tuşuna bas.
5.
Sol navigasyon çubuğundaki “ROCCAT Isku” üzerine tıkla.
Açılan sayfadan en yeni sürücü yazılımını indir.
6.
Sürücü kurulumunu başlat ve ekrandaki diğer talimatları
takip et.
ANLEITUNG
INSTRUKTIONER
INSTRUCTIONS
INSTRUCCIONES
OHJEET
INSTRUCTIONS
INSTRUKCJA
ИНСТРУКЦИИ
INSTRUKTIONER
TALIMATLAR
ROCCAT™ EASYSHIFT
[
+
]™
THE DUAL KEY ASSIGNMENT FUNCTION
EASYSHIFT[
+
]: ASSIGNING DUAL KEY FUNCTIONS
The ROCCAT™ EasyShif t [+]™ function allows dedicated keys (in blue), to perform
additional tasks by assigning them t wo functions. In terms of the way it works,
the EasyShif t [+] key is very similar to the Shif t key on the keyboard. For instance,
if you hold down the EasyShif t [+] key on the Isku and press one of the dedicated
keys that work with EasyShif t [+] at the same time, you execute a second function
(= dual-assignment).
This makes it possible to assign each individual key in one of the three Easy-
Shif t [+] Zones, not just one, but two individual functions. In doing so, the number
of available functions is doubled. When deciding on which keys interact with
EasyShif t [+], the emphasis was placed on those that are the easiest and quickest
to reach. Ultimate ergonomics and maximum functionalit y can fi nally coexist in
harmony!
PRACTICAL MACRO CONTROLS
The Isku also comes with the award-winning ROCCAT™ Macro Manager. Use the
Macro Manager to create short or complex command sequences for your applica-
tions and games. Just like the preconfi gured ones supplied with the driver, these
custom macros can be assigned easily to any one of the Isku’s macro keys – and of
course as a dual-assignment in combination with the EasyShift[+] key. All the keyboard
settings, including the key assignments, can be stored in any one of 5 Game Profi les
and automatically loaded when a game is launched. If one profi le is set as the
‘Windows Profi le’, this is automatically switched to when you return to Windows®.
EASYSHIFT[
+
]™ EXAMPLES:
HOW TO USE MACRO LIVE! RECORDING
START LIVE! RECORDING
ASSIGN A MACRO KEY
STOP LIVE! RECORDING
O
L
L
H
E
+
+
+
+
O
L
L
H
E
+
+
+
+
1
2
4
TYPE YOUR OWN MACRO
3
EXAMPLE: “HELLO”
EXAMPLE: M1
PRESS “M-REC”-BUTTON
PRESS “M-REC”-BUTTON AGAIN
PLEASE NOTE:
THE DELAY WILL ALSO BE RECORDED
AFTER PRESSING THE “REC”-KEY
EasyShift[+] WoW:
[+] +
1
= Mount up
[+] +
A
= Use hearthstone
[+] +
2
= Dismount
[+] +
S
= Autorun
[+] +
3
= Pet attack
[+] +
D
= Hotbar slot #1
[+] +
4
= Pet passive
[+] +
F
= Hotbar slot #2
[+] +
5
= Pet follow
[+] +
G
= Start timer
[+] +
Q
= Yell chat
[+] +
Z
= Your macro #1
[+] +
W
= World map
[+] +
X
= Your macro #2
[+] +
E
= Trade chat
[+] +
C
= Your macro #3
[+] +
R
= Raid chat
[+] +
V
= Your macro #4
[+] +
T
= Party chat
[+] +
B
= Your macro #5
EasyShift[+] Multimedia:
EasyShift[+] Browser:
[+] +
M1
= Play or pause
[+] +
M1
= New tab
[+] +
M2
= Stop playback
[+] +
M2
= New window
[+] +
M3
= Play the previous item
[+] +
M3
= Switch to previous tab
[+] +
M4
= Play the next item
[+] +
M4
= Switch to next tab
[+] +
M5
= Rewind
[+] +
M5
= Switch to full screen & back
[+] +
T1
= Volume up
[+] +
T1
= Page back
[+] +
T2
= Volume down
[+] +
T2
= Page forward
[+] +
T3
= Mute volume
[+] +
T3
= Minimize window
Use the
EasyShift[
+
]
key to access 2nd level
functions on all other
highlighted keys.
This allows you to
virtually
duplicate
the number of macro
keys by assigning
two
functions
to every
single macro
key.
EasyShift[
+
] key:
Caps Lock, Macro keys
(M1-M5) and Thumbster keys
(T1-T3) can also be assigned
as the EasyShift[+] key.
Thumbster keys (T1-T3)
EasyZone keys:
20 additional, easy-to-
reach macros & functions
via
EasyShift[
+
]
additional Macro
keys (M1-M5)
[+] = EasyShift[+] key
"Ładowanie instrukcji" oznacza, że należy poczekać, aż plik się załaduje i będzie można go czytać online. Niektóre instrukcje są bardzo obszerne, a czas ich ładowania zależy od prędkości Twojego internetu.
Czy ta instrukcja była pomocna?
O tej instrukcji
- Marka
- ROCCAT
- Model
- Isku
- Typ dokumentu
- Instrukcja obsługi
- Kategoria
- Klawiatura
- Język(i)
- Niemiecki, Angielski, Hiszpański, Francuski, Polski, Rosyjski
- Strony
- 1
- Rozmiar pliku
- 4,9 MB
- Format


