
Bosch BSGL 42080 Odkurzacz – Instrukcja obsługi w formacie pdf, czytaj online za darmo. Mamy nadzieję, że okaże się ona pomocna w przypadku jakichkolwiek pytań związanych z użytkowaniem urządzenia.
Jeśli nadal masz wątpliwości, zadaj pytanie w komentarzach pod instrukcją.
"Ładowanie instrukcji" oznacza, że musisz poczekać na pobranie pliku, aby móc go przeczytać online. Niektóre instrukcje są bardzo obszerne, a czas ich ładowania zależy od szybkości łącza internetowego.


40
fr
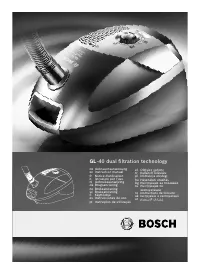
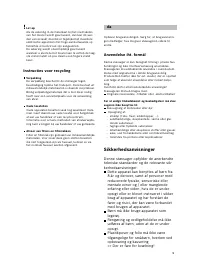
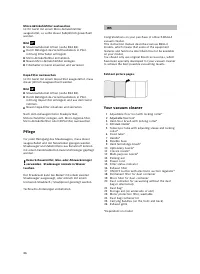
Nous vous remercions d'avoir choisi un aspirateur
Bosch de la série BSGL4.
Cette notice d'utilisation présente différents modèles
BSGL4. Il est donc possible que les caractéristiques et
fonctions décrites ne correspondent pas toutes à votre
modèle.
Utilisez exclusivement les accessoires d'origine Bosch.
Ils sont spécialement conçus pour votre aspirateur, afin
d'obtenir un résultat de nettoyage optimal.
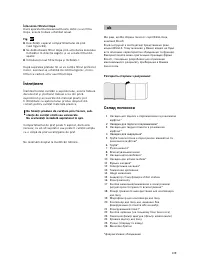
Veuillez déplier les pages d’images!
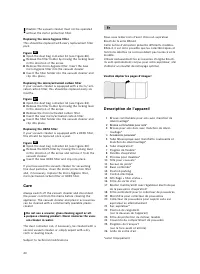
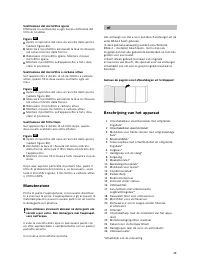
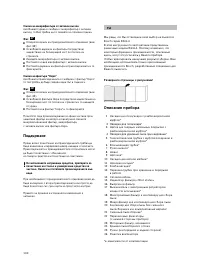
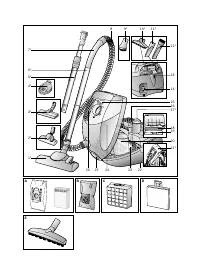
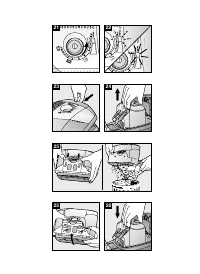
Description de l’appareil
1 Brosse commutable pour sols avec manchon de
déverrouillage*
2 Brosse commutable pour sols*
3 Brosse pour sols durs avec manchon de déver-
rouillage*
4 Accessoire perceuse*
5 Tube télescopique avec manchette coulissante et
manchon de déverrouillage*
6 Tube d'aspiration*
7 Poignée de flexible*
8 Flexible d'aspiration
9 Pinceau pour meubles*
10 Tête pour coussins*
11 Suceur de joints*
12 Buse combinée*
13 Position parking
14 Cordon électrique
15 Affichage « filter status »
16 Filtre de sortie d'air
17 Bouton marche/arrêt avec régulateur électronique
de la puissance d'aspiration*
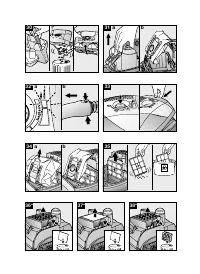
18 Filtre permanent pour le collecteur de poussières
19 Microfiltre pour collecteur de poussières
20 Collecteur de poussières pour aspirer sans sac
aspirateur
ou alternativement
21 Sac aspirateur*
22 Position de rangement
(sur le dessous de l'appareil)
23 Filtre de protection du moteur, lavable
24 Couvercle du compartiment de poussière
25 Poignées de transport
(sur la face avant et arrière)
26 Grille de sortie d'air
*selon l'équipement
!
Caution:
The vacuum cleaner must not be operated
without the motor protection filter.
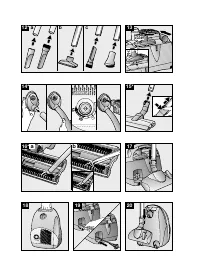
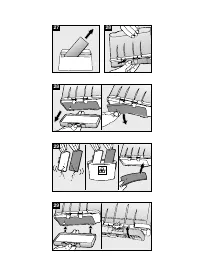
Replacing the micro-hygiene filter
This should be replaced with every replacement filter
pack
Figure
䡲
Open the dust bag container lid (see Figure 33).
䡲
Release the filter holder by moving the locking lever
in the direction of the arrow.
䡲
Remove the micro-hygiene filter. Insert the new
micro-hygiene filter into the vacuum cleaner.
䡲
Insert the filter holder into the vacuum cleaner and
clip into place.
Replacing the micro/activated carbon filter
If your vacuum cleaner is equipped with a micro/ acti-
vated carbon filter, this should be replaced every six
months.
Figure
䡲
Open the dust bag container lid (see Figure 33).
䡲
Release the filter holder by moving the locking lever
in the direction of the arrow.
䡲
Remove the micro/activated carbon filter.
䡲
Insert the new micro/activated carbon filter.
䡲
Insert the filter holder into the vacuum cleaner and
clip into place.
Replacing the HEPA filter
If your vacuum cleaner is equipped with a HEPA filter,
this should be replaced once a year.
Figure
䡲
Open the dust bag container lid (see Figure 33).
䡲
Release the HEPA filter by moving the locking lever
in the direction of the arrow and remove it from the
vacuum cleaner.
䡲
Insert the new HEPA filter and clip into place.
If you have used the vacuum cleaner for vacuuming
fine dust particles, clean the motor protection filter
and, if necessary, replace the micro-hygiene filter,
micro/activated carbon filter or HEPA filter.
Care
Always switch off the vacuum cleaner and disconnect
the power cord from the mains before cleaning the
appliance. The vacuum cleaner and plastic accessories
can be cleaned with a commercially available plastic
cleaner.
!
Do not use a scourer, glass-cleaning agent or all-
purpose cleaning product. Never immerse the vacu-
um cleaner in water.
The dust container can, if necessary, be cleaned with a
second vacuum cleaner or simply wiped with a dry
cloth or dusting brush.
Subject to technical modifications.
38*
37*
36*
Nadal masz pytania?Nie znalazłeś odpowiedzi w instrukcji lub masz inne problemy? Zadaj pytanie w poniższym formularzu i opisz szczegółowo swoją sytuację, aby inni użytkownicy i eksperci mogli udzielić ci odpowiedzi. Jeśli wiesz, jak rozwiązać problem innej osoby, podziel się swoją wiedzą :)


