Zelmer ZMM9801B - Instrukcja obsługi
Maszynka do mięsa Zelmer ZMM9801B – Instrukcja obsługi, czytaj za darmo online w formacie PDF. Mamy nadzieję, że to pomoże rozwiązać wszelkie problemy, które mogą się pojawić. Jeśli masz dodatkowe pytania, skontaktuj się z nami za pomocą formularza kontaktowego.


Spis treści:
- Strona 2 – INSTRUKCJE BEZPIECZEŃSTWA
- Strona 3 – “click”
- Strona 10 – SICHERHEITSHINWEISE
ZMM9801B
ZMM9802B
INSTRUKCJA UŻYTKOWANIA
Maszynka do mielenia mięsa
ИНСТРУКЦИЯ ПО ЭКСПЛУАТАЦИИ
Мясорубка
NÁVOD K POUŽITÍ
Mlýnek na maso
ИНСТРУКЦИИ ЗА УПОТРЕБА
Месомелачка
NÁVOD NA UOBSLUHU
Mlynček na mäso
ІНСТРУКЦІЯ ПО ЗАСТОСУВАННЮ
М'ясорубка
USER MANUAL
Meat mincer
BENUTZERHANDBUCH
Fleischwolf
HASZNÁLATI UTASÍTÁS
Húsdaráló
INSTRUCȚIUNI DE UTILIZARE
Mașină de tocat carne
PL
EN
DE
CZ
SK
HU
RO
RU
UA
BG
ZMM9801B / ZMM9802B
DZIĘKUJEMY ZA WYBÓR MARKI ZELMER. ŻYCZYMY SATYSFAKCJI Z UŻYTKOWANIA
URZĄDZENIA.
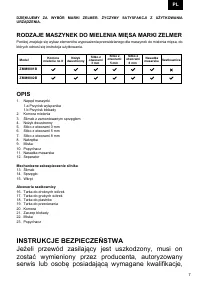
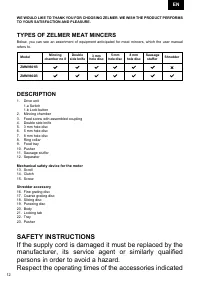
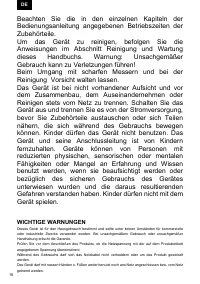
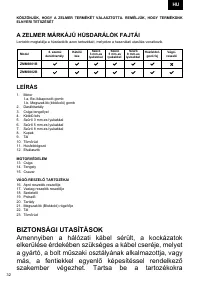
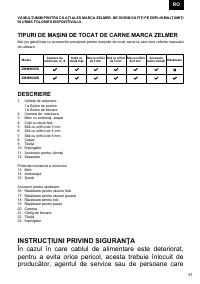
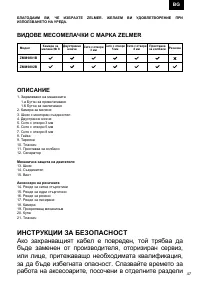
RODZAJE MASZYNEK DO MIELENIA MIĘSA MARKI ZELMER
Poniżej znajduje się wykaz elementów wyposażenia przewidzianego dla maszynek do mielenia mięsa, do
których odnosi się instrukcja użytkowania.
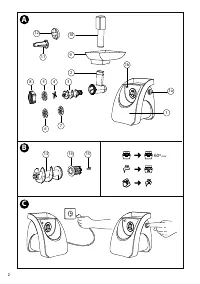
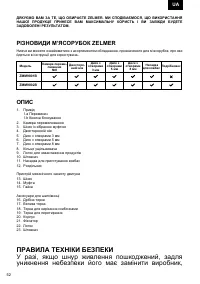
OPIS
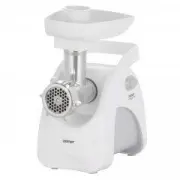
1. Napęd maszynki
1.a Przycisk wyłącznika
1.b Przycisk blokady
2. Komora mielenia
3. Ślimak z zamontowanym sprzęgłem
4. Nożyk dwustronny
5. Sitko z otworami 3 mm
6. Sitko z otworami 5 mm
7. Sitko z otworami 8 mm
8. Nakrętka
9. Miska
10. Popychacz
11. Nasadka masarska
12. Separator
Mechaniczne zabezpieczenie silnika
13. Ślimak
14. Sprzęgło
15. Wkręt
Akcesoria szatkownicy
16. Tarka do drobnych wiórek
17. Tarka do grubych wiórek
18. Tarka do plastrów
19. Tarka do przecierania
20. Komora
21. Zaczep blokady
22. Miska
23. Popychacz
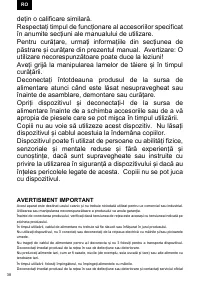
INSTRUKCJE BEZPIECZEŃSTWA
Jeżeli przewód zasilający jest uszkodzony, musi on
zostać wymieniony przez producenta, autoryzowany
serwis lub osobę posiadającą wymagane kwalifikacje,
aby uniknąć zagrożenia.
Przestrzegaj czasu działania akcesoriów podanego w
poszczególnych rozdziałach instrukcji obsługi.
Podczas czyszczenia postępuj zgodnie z rozdziałem
niniejszej instrukcji obsługi dotyczącym konserwacji i
czyszczenia. Ostrzeżenie: Nieprawidłowe użytkowanie
grozi obrażeniami!
Należy zachować ostrożność podczas obsługi ostrzy
tnących i podczas czyszczenia.
Należy zawsze odłączać produkt od zasilania, jeśli
pozostaje on bez nadzoru lub przed montażem,
demontażem bądź czyszczeniem.
Wyłącz urządzenie i odłącz je od zasilania przed zmianą
akcesoriów lub zbliżaniem się do części, które mogą
poruszać się podczas użytkowania.
Dzieci nie mogą korzystać z tego urządzenia.
Urządzenie oraz jego przewód należy przechowywać
poza zasięgiem dzieci.
Urządzenie może być używane przez osoby o
obniżonych zdolnościach fizycznych, sensorycznych i
umysłowych oraz bez doświadczenia i wiedzy, jeśli są
nadzorowane
lub
poinstruowane
w
zakresie
użytkowania urządzenia w bezpieczny sposób oraz jeśli
zrozumiały związane z tym zagrożenia. Dzieciom nie
wolno bawić się urządzeniem.
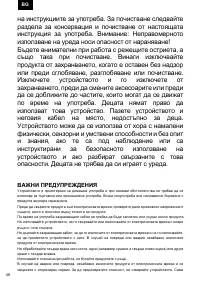
WAŻNE OSTRZEŻENIA
Urządzenie zostało zaprojektowane do użytku domowego i pod żadnym pozorem nie powinno być
wykorzystywane do użytku komercyjnego lub przemysłowego. Każde nieprawidłowe użycie lub niewłaści-
wa obsługa produktu spowoduje unieważnienie gwarancji.
Przed podłączeniem produktu do sieci należy sprawdzić, czy napięcie sieciowe jest takie samo, jak
wskazano na etykiecie produktu.
Podczas użytkowania przewód zasilania nie może być splątany ani okręcony wokół produktu.
Nie używaj urządzenia ani nie podłączaj i odłączaj go od sieci gdy masz mokre ręce i/lub stopy.
Nie ciągnij za przewód zasilania w celu odłączenia go od sieci i nie używaj go do przenoszenia urządzenia.
W przypadku awarii lub uszkodzenia należy natychmiast odłączyć produkt od sieci.
Nie przetwarzaj twardej żywności, takiej jak kości, orzechy (np. suszone i twarde ziarna soi) lub innej
żywności z twardymi ścięgnami.
Podczas obsługi zamiast popychać żywności rękoma należy korzystać z popychacza.
W przypadku jakiejkolwiek awarii lub uszkodzenia natychmiast odłączyć urządzenie od sieci i skontak-
tować się z autoryzowanym działem wsparcia technicznego. Aby zapobiec ryzyku i zagrożeniom, nie
otwierać urządzenia. Naprawy lub inne operacje dotyczące urządzenia może wykonywać tylko wykwalifi-
kowany personel techniczny z oficjalnego działu wsparcia technicznego marki.
Eurogama Sp. z o.o.
nie ponosi odpowiedzialności za jakiekolwiek szkody lub uszkodzenia, które mogą
wystąpić u ludzi, zwierząt lub przedmiotów w wyniku nieprzestrzegania powyższych ostrzeżeń.
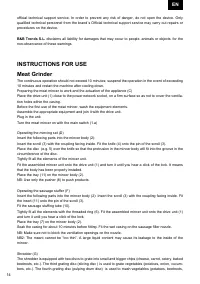
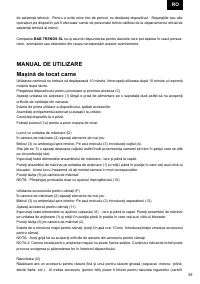
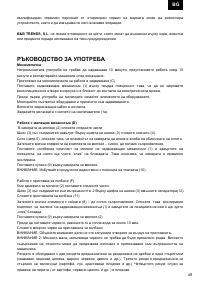
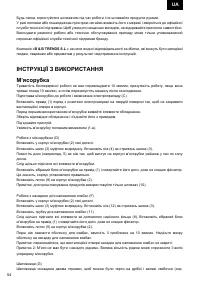
INSTRUKCJE UŻYTKOWANIA
Maszynka do mielenia mięsa
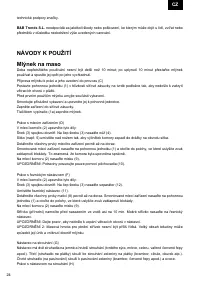
Nieprzerwany czas pracy nie powinien być dłuższy niż 10 minut; przerwij użytkowanie po upływie 10 minut
i ponownie uruchom maszynkę po jej wystygnięciu.
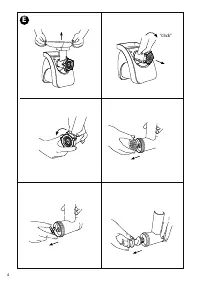
Przygotowanie maszynki do pracy i jej uruchomienie (C)
Napęd (1) postaw w pobliżu gniazdka sieci na twardym podłożu tak, aby nie zasłaniać otworów wentylacy-
jnych w obudowie.
Przed pierwszym użyciem maszynki umyj elementy wyposażenia.
Zmontuj odpowiednie wyposażenie i dołącz do napędu.
Podłącz urządzenie do zasilania.
Przyciskiem wyłącznika (1a) uruchom maszynkę.
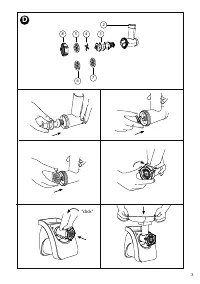
Praca z zespołem mielącym (D)
W komorze mielenia (2) umieścić poniższe części:
Ślimak (3) sprzęgłem do środka. Na trzpień ślimaka (3) wpasować nożyk (4).
Sitko (np. 5) umieścić nad nożykiem tak, aby występ komory wszedł w rowek na obwodzie sitka.
Dokręcić wszystkie elementy zespołu mielącego mocno do oporu.
Założyć zmontowany zespół mielący, na napęd (1) i obróć do pozycji, przy której usłyszysz dźwięk
załączenie blokady. Oznacza to, że komora została właściwie zamontowana.
Nałożyć miskę (9) na komorę mielenia (2).
UWAGA: Produkty popychać tylko za pomocą popychacza (10).
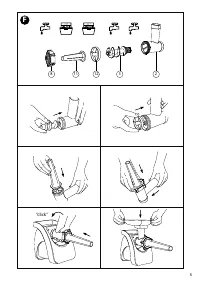
Praca z nasadką masarską (F)
W komorze mielenia (2) umieścić poniższe części:
Ślimak (3) sprzęgłem do środka. Na trzpień ślimaka (3) wpasować separator (12).
Umieścić nasadkę masarską (11).
Dokręć wszystkie elementy nakrętką (8) mocno do oporu. Założyć zmontowany zespół mielący, na napęd
(1) i obróć do pozycji, przy której usłyszysz dźwięk załączenie blokady.
Nałożyć miskę (9) na komorę mielenia (2).
Przed nałożeniem kiełbaśnicy (osłonki z jelita) namocz ją w wodzie przez ok. 10 min. Mokrą kiełbaśnicę
nałóż na nasadkę masarską.
UWAGA: Zwróć uwagę, aby nie zatkać otworów odpowietrzających w nasadce.
UWAGA 2: Masa mięsna wypełniająca jelito nie może być zbyt rzadka. Duża zawartość płynów może
spowodować ich wyciek i przedostawanie się do wnętrza maszynki.
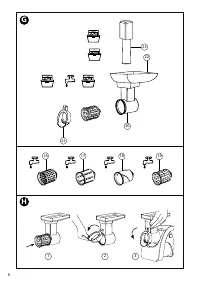
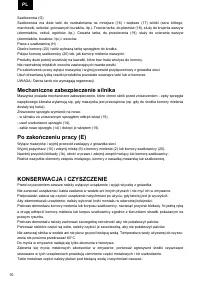
Szatkownica (G)
Szatkownica ma dwie tarki do rozdrabniania na mniejsze (16) i większe (17) wiórki (sera żółtego,
marchewki, selerów, gotowanych buraków, itp.). Trzecia tarka, do plastrów (18), służy do krojenia warzyw
(ziemniaków, cebuli, ogórków, itp.). Czwarta tarka, do przecierania (19), służy do ucierania warzyw
(ziemniaków, buraków, itp.) i owoców.
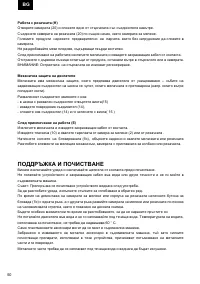
Praca z szatkownicą (H)
Otwórz komorę (20) i włóż wybraną tarkę sprzęgłem do środka.
Połącz komorę szatkownicy (20) tak, jak komorę mielenia maszynki.
Produkty duże pokrój wcześniej na kawałki, które bez trudu włożysz do komory.
Nie rozdrabniaj miękkich owoców zawierających twarde pestki.
Po zakończeniu pracy wyłącz maszynkę i wyjmij przewód przyłączeniowy z gniazdka sieci.
Usuń drewnianą łyżką resztki produktów pozostałe wewnątrz tarki lub w komorze.
UWAGA: Ostrza tarek nie wymagają regeneracji.
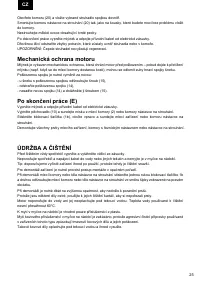
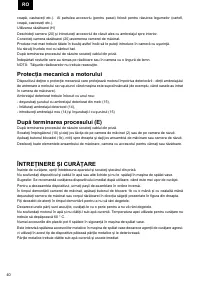
Mechaniczne zabezpieczenie silnika
Maszynka posiada mechaniczne zabezpieczenie, które chroni silnik przed zniszczeniem - zęby sprzęgła
napędowego ślimaka wyłamują się, gdy maszynka jest przeciążona (np. gdy do środka komory mielenia
dostały się kości).
Zniszczone sprzęgło wymienić na nowe:
- w ślimaku ze zniszczonym sprzęgłem odkręć wkręt (15),
- usuń uszkodzone sprzęgło (14),
- załóż nowe sprzęgło (14) i dokręć je wkrętem (15).
Po zakończeniu pracy (E)
Wyłącz maszynkę i wyjmij przewód zasilający z gniazdka sieci.
Wyjmij popychacz (10) i zdejmij miskę (9) z komory mielenia (2) lub komory szatkownicy (20).
Naciśnij przyciski blokady (1b), obróć w prawo i zdejmij zespół mielący lub komorę szatkownicy.
Rozłóż wszystkie elementy zespołu mielącego, komory z nasadką masarską lub szatkownicę.
KONSERWACJA I CZYSZCZENIE
Przed czyszczeniem zawsze należy wyłączyć urządzenie i wyjąć wtyczkę z gniazdka.
Nie zanurzać urządzenia i kabla zasilania w wodzie ani innych płynach i nie myć ich w zmywarce.
Podpowiedź: zaleca się czyścić urządzenie natychmiast po użyciu, gdy łatwiej jest je wyczyścić.
Aby zdemontować urządzenie, należy wykonać kroki montażu w odwrotnej kolejności.
Podczas demontażu komory mielenia lub korpusu szatkownicy, nacisnąć przycisk blokady 1b jedną ręką
a drugą odkręcić komorę mielenia lub korpus szatkownicy zgodnie z kierunkiem strzałki pokazanym na
prawym rysunku.
Podczas demontażu należy zachować szczególną ostrożność aby nie pokaleczyć palców.
Ponieważ niektóre części są ostre, należy czyścić je szczoteczką, aby nie pokaleczyć palców.
Nie zanurzaj silnika w wodzie ani nie płucz go pod bieżącą wodą. Temperatura wody używanej do czyszc-
zenia nie powinna przekraczać 60°C.
Do mycia w zmywarce nadają się tylko akcesoria z tworzywa.
Zabrania się mycia metalowych akcesoriów w zmywarce, ponieważ agresywne środki czyszczące
stosowane w tych urządzeniach powodują ciemnienie części metalowych i ich uszkodzenie.
Takie metalowe części należy płukać pod bieżącą wodą i natychmiast osuszać.
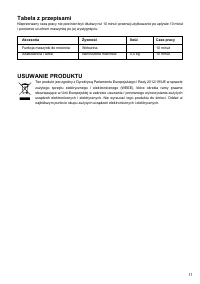
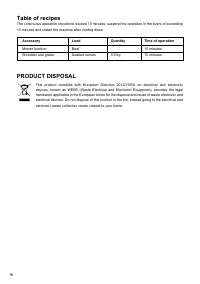
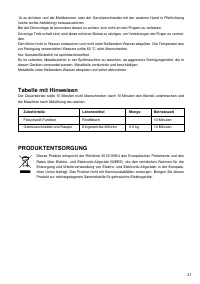
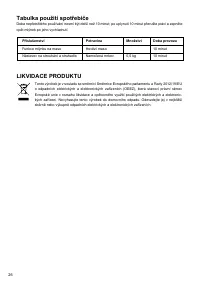
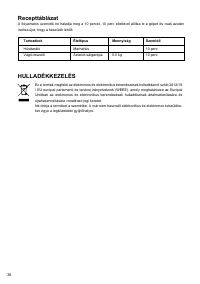
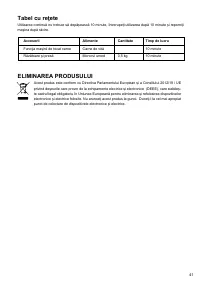
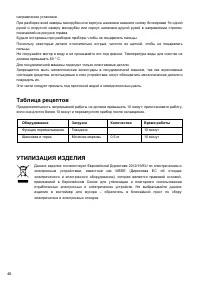
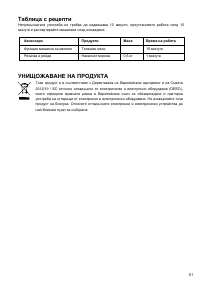
Tabela z przepisami
Nieprzerwany czas pracy nie powinien być dłuższy niż 10 minut; przerwij użytkowanie po upływie 10 minut
i ponownie uruchom maszynkę po jej wystygnięciu.
USUWANIE PRODUKTU
"Ładowanie instrukcji" oznacza, że należy poczekać, aż plik się załaduje i będzie można go czytać online. Niektóre instrukcje są bardzo obszerne, a czas ich ładowania zależy od prędkości Twojego internetu.
Podsumowanie
2 DZIĘKUJEMY ZA WYBÓR MARKI ZELMER. ŻYCZYMY SATYSFAKCJI Z UŻYTKOWANIA URZĄDZENIA. RODZAJE MASZYNEK DO MIELENIA MIĘSA MARKI ZELMER Poniżej znajduje się wykaz elementów wyposażenia przewidzianego dla maszynek do mielenia mięsa, do których odnosi się instrukcja użytkowania. OPIS 1. Napęd maszynki 1.a P...
3 DZIĘKUJEMY ZA WYBÓR MARKI ZELMER. ŻYCZYMY SATYSFAKCJI Z UŻYTKOWANIA URZĄDZENIA. RODZAJE MASZYNEK DO MIELENIA MIĘSA MARKI ZELMER Poniżej znajduje się wykaz elementów wyposażenia przewidzianego dla maszynek do mielenia mięsa, do których odnosi się instrukcja użytkowania. OPIS 1. Napęd maszynki 1.a P...
10 DZIĘKUJEMY ZA WYBÓR MARKI ZELMER. ŻYCZYMY SATYSFAKCJI Z UŻYTKOWANIA URZĄDZENIA. RODZAJE MASZYNEK DO MIELENIA MIĘSA MARKI ZELMER Poniżej znajduje się wykaz elementów wyposażenia przewidzianego dla maszynek do mielenia mięsa, do których odnosi się instrukcja użytkowania. OPIS 1. Napęd maszynki 1.a ...