Asus GX601 - Instrukcja obsługi
Obudowa PC Asus GX601 – Instrukcja obsługi, czytaj za darmo online w formacie PDF. Mamy nadzieję, że to pomoże rozwiązać wszelkie problemy, które mogą się pojawić. Jeśli masz dodatkowe pytania, skontaktuj się z nami za pomocą formularza kontaktowego.
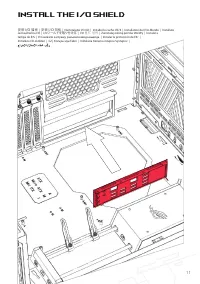
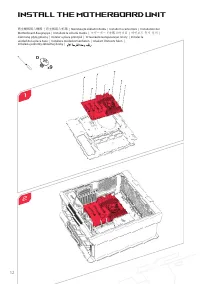
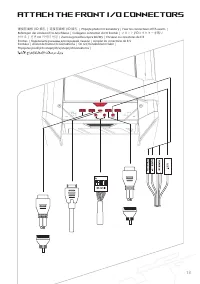
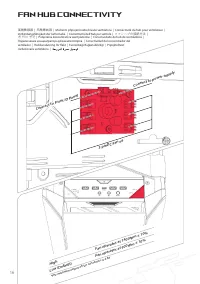

Spis treści:
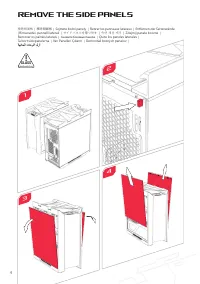
- Strona 3 – Remove the Side Panels
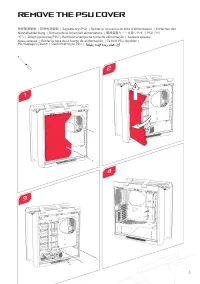
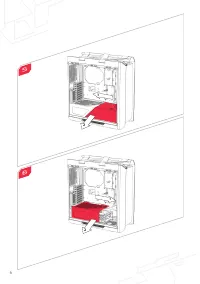
- Strona 4 – Remove the PSU Cover
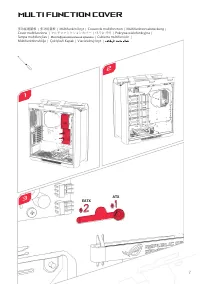
- Strona 6 – Multi Function Cover
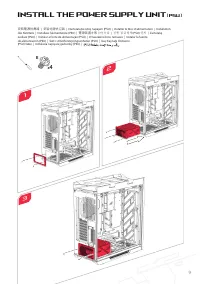
- Strona 7 – Install the Power Supply Unit
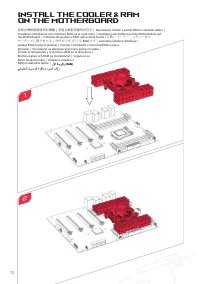
- Strona 10 – Install the Motherboard Unit
- Strona 12 – Fan Hub Connectivity
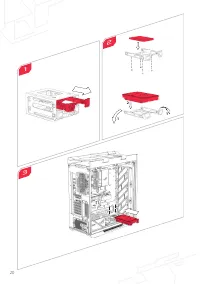
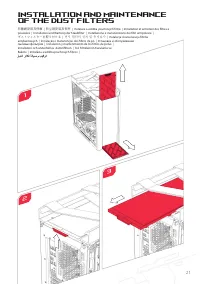
- Strona 14 – Installation and Maintenance
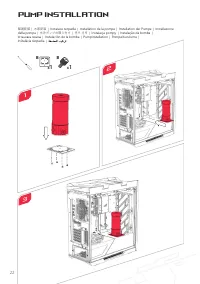
- Strona 15 – Pump Installation
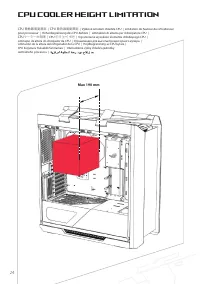
- Strona 17 – CPU Cooler Height Limitation
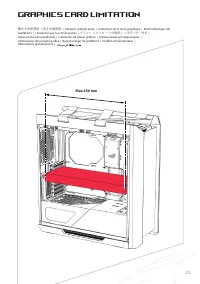
- Strona 18 – Graphics Card Limitation
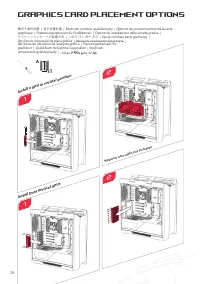
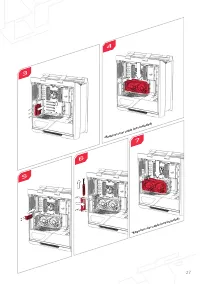
- Strona 19 – Graphics Card Placement Options
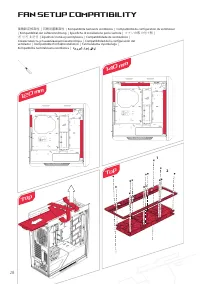
- Strona 21 – Fan Setup Compatibility; Top
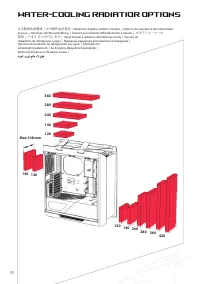
- Strona 22 – Water-cooling Radiatior Options
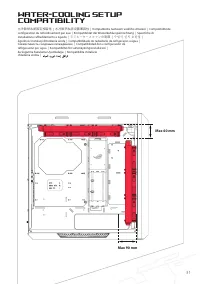
- Strona 23 – Compatibility
- Strona 27 – AEEE Yönetmeliğine Uygundur.
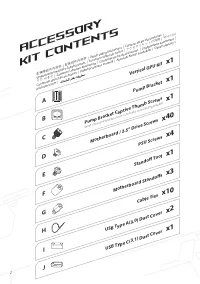
Accessory
Kit Contents
配備零組件內容物
|
配备组件内容物
| Obsah sady př
íslušenst
ví | C
ontenu du k
it d'ac
cessoir
es |
Verpack
ungsinhalt des Z
ubehörsa
tzes | A
ccessor
i con
tenuti nel k
it |
アクセサリキットの内容
|
액세서리
키트 내용물
| Za
wartość z
estawu akc
esorió
w | C
onteúdo do k
it de ac
essór
ios | С
одер
жимое к
омплек
та |
Cont
enido del k
it de ac
cesor
ios |
Tillbehörssa
tsens innehåll | A
ksesuar K
itinin İçindek
iler | Obsah súpr
avy s
príslušenst
vom |
Cable Ties
x10
USB Type A(3.0) Dust Cover
x2
USB Type C(3.1) Dust Cover
x1
Motherboard Standoffs
x3
Standoff Tool
x1
Motherboard / 2.5” Drive Screws
x40
x1
Pump Bracket
x1
Vertical GPU Kit
x1
PSU Screws
x4
A
B
C
D
E
F
G
H
I
J
2
Pump Bracket Captive Thumb Screws
(Note: the pump bracket screw is included on the pump bracket)
"Ładowanie instrukcji" oznacza, że należy poczekać, aż plik się załaduje i będzie można go czytać online. Niektóre instrukcje są bardzo obszerne, a czas ich ładowania zależy od prędkości Twojego internetu.
Czy ta instrukcja była pomocna?
O tej instrukcji
- Marka
- Asus
- Model
- GX601
- Typ dokumentu
- Instrukcja obsługi
- Kategoria
- Obudowa PC
- Język(i)
- Niemiecki, Angielski, Hiszpański, Francuski, Włoski, Dutch, Polski, Rosyjski, Swedish
- Strony
- 27
- Rozmiar pliku
- 3,4 MB
- Format
Podsumowanie
4 Remove the Side Panels 1 3 移除側面板 | 移除侧面板 | Sejm ě te bo č ní panely | Retirer les panneaux latéraux | Entfernen der Seitenwände | Rimuovete i pannelli laterali | サイドパネルを取り外す | 측면 패널 제거 | Zdejmij panele boczne | Remover os painéis laterais | Снимите боковые панели | Quite los paneles laterales | Ta...
5 Remove the PSU Cover 移除電源遮板 | 移除电源盖板 | Sejm ě te kryt PSU | Retirer le couvercle du bloc d'alimentation | Entfernen der Netzteilabdeckung | Rimuovete la cover dell'alimentatore | 電源装置カバーを取り外す | PSU 커버 제거 | Zdejmij pokryw ę PSU | Remover a tampa da fonte de alimentação | Снимите крышку блока питани...
Multi Function Cover 多功能遮蓋板 | 多功能盖板 | Multifunk č ní kryt | Couvercle multifonction | Multifunktionsabdeckung | Cover multifunzione | マルチファンクションカバー | 다기능 커버 | Pokrywa wielofunkcyjna | Tampa multifunções | Многофункциональная крышка | Cubierta multifunción | Multifunktionshölje | Çok İş levli Kapak |...
Zadaj pytanie
Powiązane instrukcje
Inne urządzenia Asus
 Asus 90YH00Q1 Instrukcja obsługi
 Asus A636 Instrukcja
 Asus AC66 Instrukcja
 Asus BT1AD Instrukcja obsługi
 Asus EA-N66 Instrukcja obsługi
 Asus Gx1008b Instrukcja obsługi
 Asus H61M-K Instrukcja obsługi
 Asus HS-W1 Instrukcja obsługi
 Asus M2N-SLI Deluxe Instrukcja obsługi
 Asus M2N68-CM Instrukcja obsługi
 Asus M4A78LT-M LE Instrukcja obsługi
 Asus ML229H Instrukcja obsługi
 Asus NFC EXPRESS Instrukcja obsługi
 Asus P5E-VM DO Instrukcja obsługi
 Asus P5G41T-M SI Instrukcja obsługi
 Asus P5GC-MX/1333 Instrukcja obsługi
 Asus P5KPL-AM EPU Instrukcja obsługi
 Asus P5KPL-AM IN/ROEM/SI Instrukcja obsługi
 Asus P5N-MX Instrukcja obsługi
 Asus P5QL SE Instrukcja obsługi