Gaggenau AC 472-181 - Instrukcja obsługi
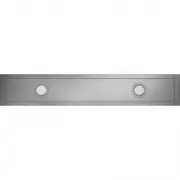
Okap Gaggenau AC 472-181 – Instrukcja obsługi, czytaj za darmo online w formacie PDF. Mamy nadzieję, że to pomoże rozwiązać wszelkie problemy, które mogą się pojawić. Jeśli masz dodatkowe pytania, skontaktuj się z nami za pomocą formularza kontaktowego.
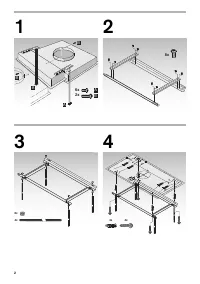
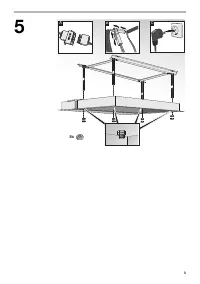


1
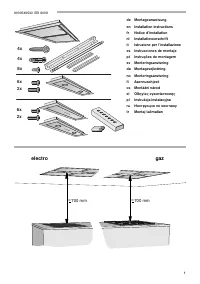
2x
2x
4x
4x
8x
6x
6x
9000549532 EB 9009
700 mm
electro
gaz
>
700 mm
>
de
Montageanweisung
en
Installation instructions
fr
Notice d’installation
nl
Installatievoorschrift
it
Istruzione per l’installazione
es
Instrucciones de montaje
pt
Instruções de montagem
sv
Monteringsanvisning
da
Montagevejledning
no
Monteringsanvisning
fi
Asennusohjeet
cs
Montážní návod
el
Οδηγίες εγκατάστασης
pl
Instrukcja instalacyjna
ru
Инструкция по монтажу
tr
Montaj talimatları
"Ładowanie instrukcji" oznacza, że należy poczekać, aż plik się załaduje i będzie można go czytać online. Niektóre instrukcje są bardzo obszerne, a czas ich ładowania zależy od prędkości Twojego internetu.