Moulinex HV4 ME461132 - Instrukcja obsługi - Strona 4

8
9
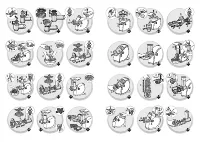
Donner aux saucisses la longueur désirée en pinçant et en tournant le boyau.
Pour avoir une saucisse de qualité, prenez soin d’éviter d’emprisonner de l’air lors du remplissage et faites des
saucisses de 10 à 15 cm (séparez les saucisses en plaçant un lien et en faisant un noeud à l’aide de celui-ci).
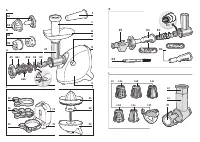
ACCESSOIRE KEBBE (cf. fig.3.1 et 3.2)
Conseil pratique :
Pour la réalisation de la pâte fine de Kebbe ou Kef ta, passer la viande 2 à 3 fois dans la tête de hachoir jusqu’à
obtention de la finesse désirée.
ACCESSOIRE BISCUITS (cf. fig. 4.1 et 4.2)
Préparez la pâte. Vous obtiendrez de meilleurs résultats avec une pâte un peu molle. Choisissez le dessin en
faisant correspondre la flèche et la forme choisie. Approvisionnez jusqu’à ce que vous ayiez obtenu la
quantité de biscuits désirée.
ACCESSOIRE STEACK (cf. fig. 5)
ACCESSOIRE PRESSE AGRUMES (cf. fig. 6.1 et 6.2)
ACCESSOIRE COULIS (cf. fig. 7)
Utilisation
: Placez un récipient pour récupérer le jus sous le guide jus
K5
et un autre en bout de filtre pour
récupérer les déchets. Pour la réalisation de coulis et de jus, il est impératif de n’utiliser que des fruits frais.
Suivant la saison et la qualité des fruits, il est conseillé de repasser une deuxième fois la pulpe pour extraire
le maximum de coulis ou de jus.
Jus
: Utilisez le filtre
K3
Coulis
: Utilisez le filtre
K4
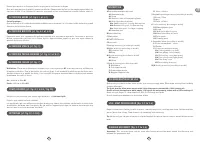
COUPE LÉGUMES (cf. fig. 8.1 à 8.6 / fig.10)
Utilisez le cône préconisé pour chaque type d’aliment : cf.
tableau fig.10.
Conseils pour obtenir de bons résultats :
Les ingrédients que vous utilisez doivent être fermes pour obtenir des résultats satisfaisants et éviter toute
accumulation d’aliment dans le magasin. Ne pas utiliser l’appareil pour râper ou trancher des aliments trop
durs tels que le sucre ou morceaux de viande.
NETTOYAGE (cf. fig. 9.1 à 9.6)
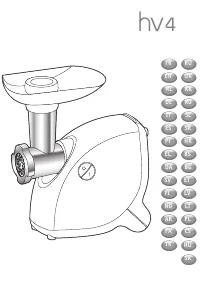
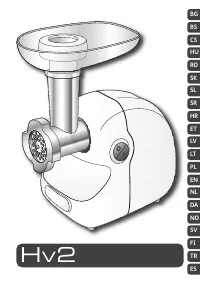
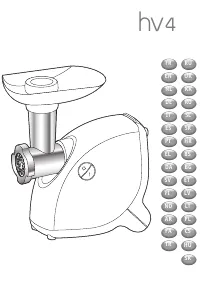
DESCRIPTION
A
Removable meat mincing head
A1
Aluminum body
A2
Screw
A3
Stainless steel self-sharpening blade
A4
Grids (according to model)
A4a
Small holes grid - for ver y fine mincing
A4b
Medium holes grid - for fine mincing
A4c
Large holes grid - for large chopping
A5
Aluminum nut
B
Removable tray
C
Meat pusher
D
START/STOP button
E
Motor unit
F
Sausage accessor y (according to model)
G
Kebbe accessor y (according to model)
G1
Connector cap
G2
Ring
H
Biscuit accessor y (according to model)
H1
Suppor t
H2
Mould
I
Steak Accessor y (according to model)
I1
Mould base
I2
Fish-shaped mould
I3
Steak-shaped mould
I4
Nuggets-shaped mould
I5
Juice collector
J
Vegetable pressing accessory (according to model)
J1
Cone / Filter
J2
Axis
J3
Juice collector
K
Coulis accessor y (according to model)
K1
Water tightness joint
K2
Screw
K3
Small holes filter for juice
K4
Mixed holes filter for coulis
K5
Juice guide
K6
Cleaning brush
L
Vegetable cutter (according to model)
L1
Cone compar tment / spout
L2
Pusher
L3
Cones (according to model)
L3a
Coarse grating cone (red)
L3b
Fine grating cone (orange)
L3c
Thick slicing cone (dark green)
L3d
Fine slicing cone (light green)
L3e
Fine dicing cone
L3f
Dice cutting accessor y
M/N
Storing accessor y (according to model)
RECOMMENDATIONS FOR USE
Before using for the first time, wash all the accessories in soapy water. Rinse them and dr y them carefully
straight af terwards.
The grids and the blade must remain oiled. Keep these parts coated with a little cooking oil.
Do not activate the appliance while empty, if the grids are not properly coated with a little cooking oil.
Never use your fingers or other utensils to push food through the spout.
Do not operate your appliance for more than 14 min.
USE : MEAT MINCING HEAD (fig. 1.1 to 1.4)
Prepare the amount of meat you wish to mince, removing any bones, car tilage and sinew. Cut the meat into
pieces (about 2cm x 2cm). Thaw frozen food completely before mincing.
Tip
: At the end, you can pass a few pieces of bread through the mincer head in order to extract all the minced
meat.
SAUSAGE ACCESSORY (fig. 2.1 to 2.3)
Important:
This accessor y must only be used af ter having minced the meat, added the flavorings and
kneaded the preparation well.
EN
"Ładowanie instrukcji" oznacza, że należy poczekać, aż plik się załaduje i będzie można go czytać online. Niektóre instrukcje są bardzo obszerne, a czas ich ładowania zależy od prędkości Twojego internetu.
Inne modele maszynki do mięsa Moulinex
-
 Moulinex HV1 ME108832
-
 Moulinex HV4 ME456139
-
 Moulinex HV4 ME460132
-
 Moulinex HV4 ME472832
-
 Moulinex HV4 ME476132
-
 Moulinex HV4 ME478138
-
 Moulinex HV8 Pro ME6868
-
 Moulinex ME 61013E
-
 Moulinex ME208139
-
 Moulinex ME445A38