Electrolux EER73IGM - Instrukcja obsługi
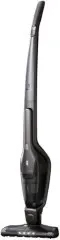
Odkurzacz Electrolux EER73IGM – Instrukcja obsługi, czytaj za darmo online w formacie PDF. Mamy nadzieję, że to pomoże rozwiązać wszelkie problemy, które mogą się pojawić. Jeśli masz dodatkowe pytania, skontaktuj się z nami za pomocą formularza kontaktowego.
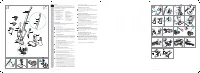
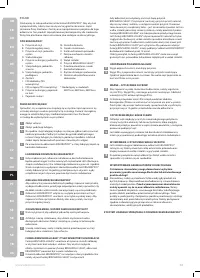
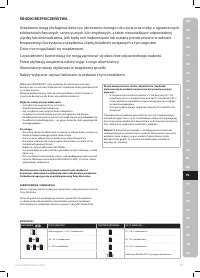


Spis treści:
- Strona 1 – ENGLISH; EE
- Strona 2 – POLSKI
- Strona 3 – ŚRODKI BEZPIECZEŃSTWA
- Strona 4 – AKCESORIA I MATERIAŁY; ZAPRASZAMY NA NASZĄ WITRYNĘ
2
www.electrolux.com
1
2
3
4
2
ENGLISH
Thank you for choosing an Electrolux ERGORAPIDO® vacuum cleaner. In
order to ensure the best results, always use original Electrolux accessories
and spare parts. They have been designed especially for your vacuum
cleaner. This product is designed with the environment in mind. All plastic
parts are marked for recycling purposes.
DESCRIPTION OF ERGORAPIDO®
A. ON/OFF button
B. Power regulation button
C. ON/OFF button, hand unit
D. Locking screw
E. Release button, hand unit
F. Charging station, wall unit
G. Charging station, fl oor unit
H. Charging adapter
I. Fine fi lter (inner fi lter)
J. Pre fi lter (outer fi lter)
K. Release button, dust container
L. Dust container
M. Dusting brush
N. Crevice nozzle
O. Cable protector grill
P. Hatch cover for brush roll
Q. Brush roll
R. BRUSHROLLCLEAN® pedal*
S. Nozzle front lights
T. Charging indicator
U. Cliff hanger
V. Slot for accessory storage
* Not on models EER71xxx,
EER72xxx, EER73xxx
BEFORE STARTING
Check that the package includes all parts described in this instruction
manual and read this manual carefully. Pay special attention to the safety
precautions chapter. Save these instructions.
1
Assemble the handle.
2
Assemble the charge stand.
3
There is a hollow space in the bottom of the charging station where
unused cable can be wound. Insert the adaptor into the mains and
position the charging station on a stable and horizontal surface away
from heat sources, direct sunlight or wet places.
4
The charging indicator will be lit when ERGORAPIDO® is placed in the
charging station.
CHARGING ERGORAPIDO®
5
When fully charged, the charging indicator will blink slowly. The num-
bers of LED lamps will indicate the level of charge. Full charging time is
around 4 hours. For better battery performance, charge ERGORAPIDO®
for 24 hours before fi rst use and always keep it on charge when not
used.
VACUUMING WITH ERGORAPIDO®
Before vacuuming, check that the nozzle wheels and the brush roll are
clean from sharp objects in order to avoid scratching sensitive fl oors
and to ensure full cleaning performance.
6
Start and stop ERGORAPIDO® by pushing the ON/OFF button.
ERGORAPIDO® will start on the high power mode.
For more silent cleaning and longer runtime, press the power regula-
tion button.
VACUUMING FURNITURE, CAR SEATS ETC.
7
Press the button to release the hand unit from the main body.
8
Attach the crevice nozzle to facilitate cleaning of areas diffi cult to reach.
Attach the brush on the crevice nozzle for dusting.
9
The crevice nozzle and small brush can be stored in the charging sta-
tion or in the slot on the back side of the handle.
BRUSHROLLCLEAN® FUNCTION (CERTAIN MODELS ONLY)
Use the BRUSHROLLCLEAN® function to keep the brush roll clean and
free from hair and fi bres. For best results use the BRUSHROLLCLEAN®
function when ERGORAPIDO® is fully charged.
10
Place ERGORAPIDO® on a hard and fl at surface. Do not use the BRUSH-
ROLLCLEAN® function on carpets.
Press the BRUSHROLLCLEAN® pedal with your foot while the cleaner is
on. Hold for 5 seconds until hairs and fi bres are removed. There will be
a cutting noise during this process, this is normal. If hairs remain on the
brush roll, repeat the process.
The BRUSHROLLCLEAN® function is equipped with an overheating
protection. If the BRUSHROLLCLEAN® function has been used for more
than 30 seconds (constant or interrupted) it will deactivate the brush
roll and turn off the nozzle front lights. The vacuum cleaner can still
be used, even when the BRUSHROLLCLEAN
®
function is deactivated.
To reactivate the BRUSHROLLCLEAN® function, place ERGORAPIDO
®
on
charge and charge for 15 minutes.
Please note that the BRUSHROLLCLEAN® function might not be able to
remove thicker threads or wires that are caught in the brush roll.
EMPTYING OF THE DUST CONTAINER
11
Remove the dust container by pressing the buttons.
12
Take out the fi lters from the dust container by pressing the release but-
tons. Empty the contents into a dustbin. Never wash the dust container
or fi lters in a dishwasher.
IMPORTANT - FILTER CLEANING!
13
The fi lters must be cleaned at regular intervals to ensure a high clean-
ing performance. Take out the fi lters by pressing the release buttons.
Separate the inner fi lter from the outer fi lter.
14
Rinse the fi lter parts carefully under lukewarm water without using any
detergents. (Never use the dishwasher or washing machine.) Shake to
remove excess water and leave to dry minimum 12h before putting
them back into the cleaner.
CLEANING THE HOSE AND NOZZLE WHEELS
15
Loosen the hose behind the nozzle from its upper connection. Remove
any object or debris that can be blocking the airfl ow in the hose or in
the air channel to the dust cup, and put the hose back.
16
If the wheels need to be cleaned or get jammed, remove them carefully
by using a fl at screwdriver.
REMOVING AND CLEANING THE BRUSH ROLL
17
If the brushroll gets blocked ERGORAPIDO® will stop. Open the cable
protector grill and the brush roll hatch cover and remove the brush roll.
18
Use a pair of scissors to remove threads etc. Reassemble the brush roll,
making sure it can spin freely.
REMOVING THE BATTERIES FOR RECYCLING
Warning; Battery removal must only be done by an Electrolux
service center or offi cial collection point!
19
Only remove batteries if the product is to be scrapped. Improper
handling of the batteries may be hazardous. Batteries should always
be completely discharged before removal. Take your product to an
Electrolux service center or offi cial collection point for recycling. They
can remove and recycle the battery and electric parts in a safe and pro-
fessional way. Follow your country’s rules for collection of rechargeable
batteries and electrical products.
Enjoy a great cleaning experience with ERGORAPIDO®!
3
www.electrolux.com
GB
FR
AR
BG
GR
NO
CZ
HR
PL
DE
HU
PT
DK
IT
RO
EE
LT
RU
ES
LV
SE
SL
FI
NL
SK
SR
TR
UA
11
9
10
12
13
14
6
5
7
8
15
17
18
16
19
3
www.electrolux.com
"Ładowanie instrukcji" oznacza, że należy poczekać, aż plik się załaduje i będzie można go czytać online. Niektóre instrukcje są bardzo obszerne, a czas ich ładowania zależy od prędkości Twojego internetu.
Czy ta instrukcja była pomocna?
O tej instrukcji
- Marka
- Electrolux
- Model
- EER73IGM
- Typ dokumentu
- Instrukcja obsługi
- Kategoria
- Odkurzacz
- Język(i)
- Niemiecki, Angielski, Hiszpański, Francuski, Włoski, Dutch, Polski, Rosyjski, Swedish
- Strony
- 5
- Rozmiar pliku
- 3,4 MB
- Format
Podsumowanie
2 www.electrolux.com 1 2 3 4 2 ENGLISH Thank you for choosing an Electrolux ERGORAPIDO® vacuum cleaner. In order to ensure the best results, always use original Electrolux accessories and spare parts. They have been designed especially for your vacuum cleaner. This product is designed with the envir...
POLSKI Dziękujemy za zakup odkurzacza Electrolux ERGORAPIDO®. Aby uzyskać najlepsze efekty, należy zawsze używać oryginalne akcesoria i części zamienne firmy Electrolux. Zostały one zaprojektowane specjalnie do tego odkurzacza. Ten produkt zaprojektowano jako bezpieczny dla środowiska. Wszystkie pla...
ŚRODKI BEZPIECZEŃSTWA Urządzenie mogą obsługiwać dzieci po ukończeniu ósmego roku życia oraz osoby o ograniczonych zdolnościach fizycznych, sensorycznych lub umysłowych, a także nieposiadające odpowiedniej wiedzy lub doświadczenia, jeśli będą one nadzorowane lub zostaną poinstruowane w zakresie bezp...
Zadaj pytanie
Powiązane instrukcje
Popularne Electrolux Odkurzacze

Więcej modeli Electrolux Odkurzacze
 Electrolux ZUCHARDFL Instrukcja obsługi
 Electrolux Clario Instrukcja obsługi
 Electrolux EC41-2SW Instrukcja obsługi
- Electrolux EC41-ANIM Instrukcja obsługi
 Electrolux EER7ALLRGY Instrukcja obsługi
 Electrolux EER73DB Instrukcja obsługi
 Electrolux EER77MBM Instrukcja obsługi
 Electrolux EF75B Instrukcja obsługi
 Electrolux EP81HB25SH Instrukcja obsługi
- Electrolux EP81UB25GG Instrukcja obsługi
 Electrolux EUP84IGM Instrukcja obsługi
 Electrolux PC91-8STM Instrukcja obsługi
 Electrolux PD91-8SSM Instrukcja obsługi
 Electrolux PF91-4ST Instrukcja obsługi
 Electrolux Silent Performer Cyclonic Instrukcja obsługi
 Electrolux UCORIGIN Instrukcja obsługi
 Electrolux UFPARKETTO Instrukcja obsługi
 Electrolux UPDELUXE Instrukcja obsługi
 Electrolux WQ81-ALRS Instrukcja obsługi